Hardwood Flooring: Refinishing or Installing-- How To DIY!!
OK- so you've discovered that the odor you thought was "musty old house needs painting" is actually "eau de rotten subfloor." This obviously pushes replacing the floor to the top of your DIY list. What's the old Yiddish proverb? "If you want to make God laugh, tell Him your plans." Same thing with This Old House-- we had PLANNED to start at the top and work our way down-- painting molding, walls, baseboards and replacing the island, counter tops, and appliances. However, the dishwasher that came with the house threw a monkey wrench in our plans by rotting the floor right out from under the five layers of various patterned vinyl. (see previous blogs for refresher photos) If you're gonna do something, you may as well do it to the best of your ability with the best material you can afford. In a house with a subfloor and crawlspace, wood, tile, or vinyl is the best choice. Pouring concrete may not be a good idea, as your foundation/subfloor is most likely not designed to support the weight. Side note-- when replacing counters but keeping original cabinetry in an older home, think long and hard about selecting granite. You absolutely MUST make sure the cabinets can support the tremendous weight of a few slabs of granite. Consult a professional if you're even slightly concerned. In our case, vinyl was most definitely NOT an option. We also did not consider pre-finished wood (although we have installed that in a previous home of ours) or laminate because we appreciate the beauty and durability of natural materials. The obvious option was to install virgin tongue and groove hardwood--plank by plank. We chose a beautifully patterned red oak. The material itself costs at least $2.00 a square foot wholesale and labor costs at least twice that, and we have around 500 square feet we'd like to cover. It was either DIY or DWO (do without)! We hauled the flooring bundles in our trusty Yuppie SUV and dropped about $300.oo for a Stanley-Bostitch Hardwood Flooring Nailer. It's this yellow, oddly shaped monstrosity that is designed so that one person can operate it. NEWSFLASH Stanley-Bostitch: That is OVERLY ambitious, even for this DIY Diva!! It takes me using both hands to hold the thing, now dubbed "Old Yeller," and my husband posing as a lu
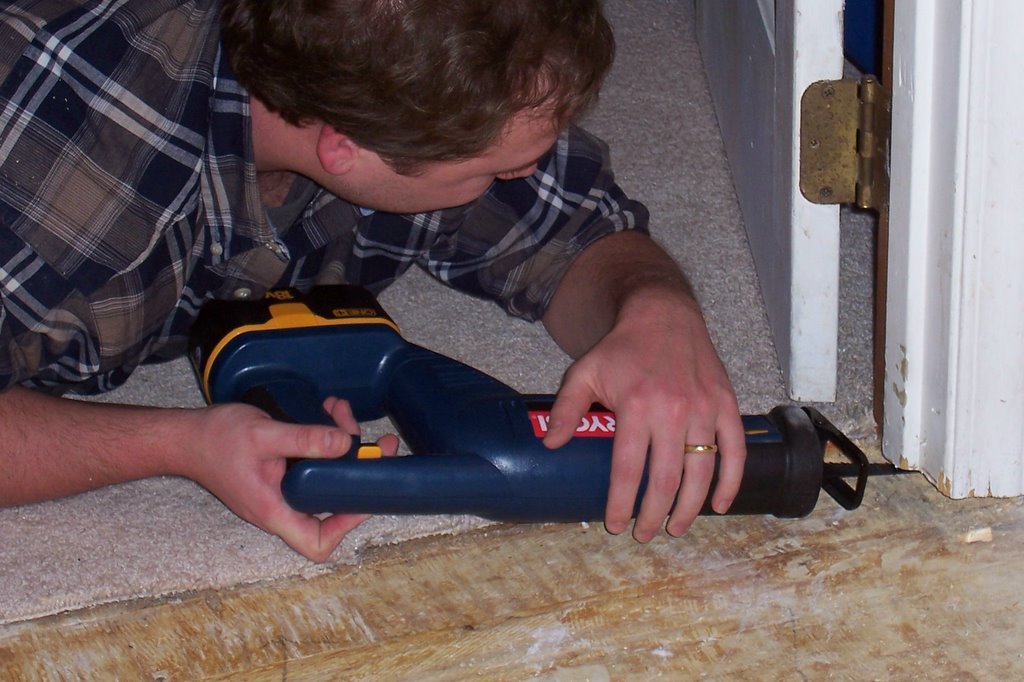
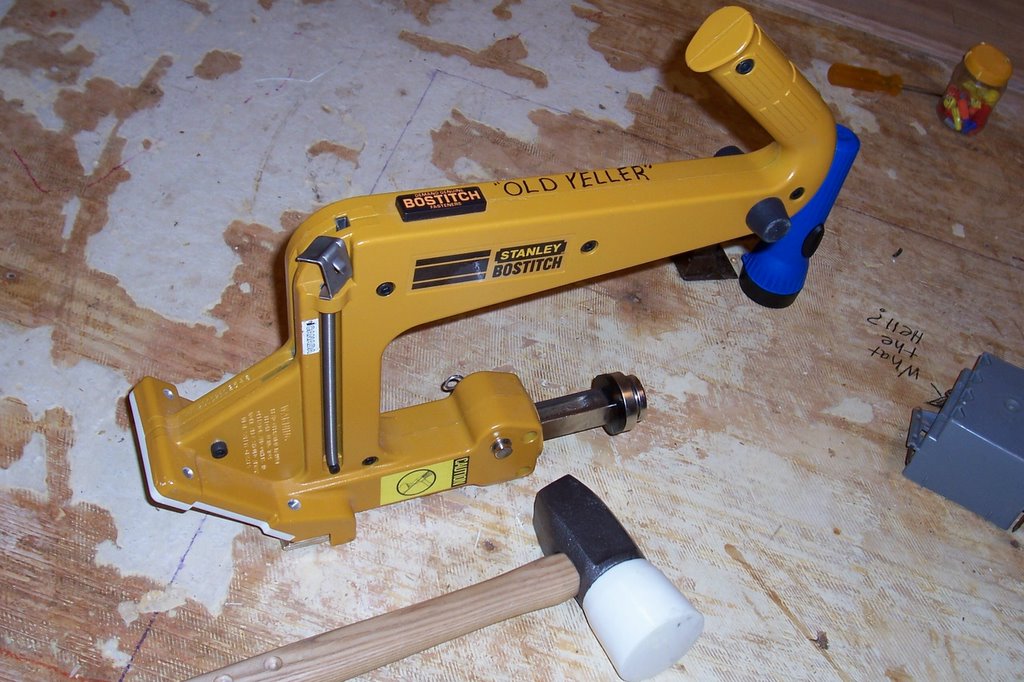 mberjack to wack the living hell out of it in a effort to drive the unreasonably dull, two-inch "flooring cleats" through the tongue and into the subfloor. (PANT PANT, it wears me out just typing about it!!) You must use a reciprocating saw to trim out the door frames in order to get the hardwood under the door frame and achieve the "built in look" as opposed to an obvious "retro-fit." Having a chisel handy helps, too.
Once you have trimmed your doorways, you are ready to lay your flooring. In all honesty, you should probably drop a plumb line and start in the center of your flooring-- but let's get real-- we started at the door. Work with the tongue going away from you, s
 tagger the seams throughout, and use a 6 to 8 inch length of the hardwood as a "banging block" for a rubber mallet. Use the mallet and block to bang the groove of one board onto the tongue of the previously nailed board. Have a flat headed screwdriver, prybar, tape measure, and box of bandaids available. Proceed across the floor taking care to get seams as tight as possible, as wooden flooring expands a contracts daily. Eventually, your floor will "settle" into its comfort zone. Use a miter saw for cutting straight lines and angles, use a table or jigsaw for cutting shapes or notches, use a Dremel Drill with a cutting bit for cutting the heads off of flooring cleats that don't go all the way in (hey, it happens). If you're "saw poor" already, a reciprocating saw can be a cumbersome but somewhat acceptable substitution for a more expensive jigsaw or table saw. Once the flooring is ins
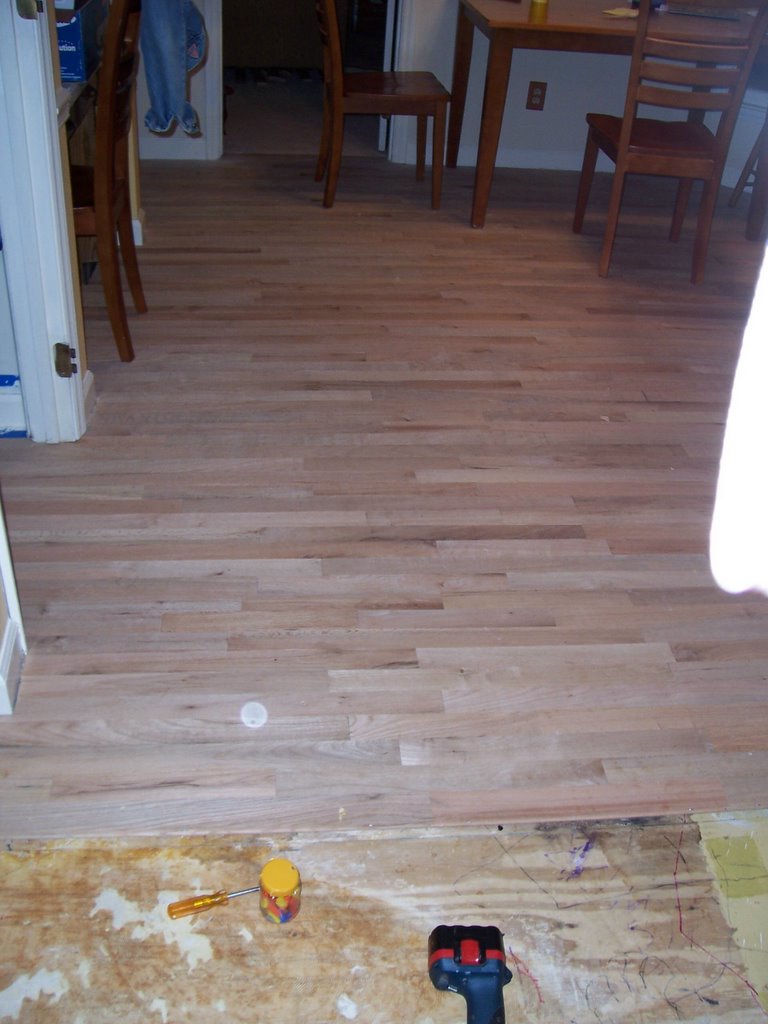 talled, rent a floor sander and go over the entire surface with a 50 grit floor sandpaper, then an 80 grit at the least. Some recommend finishing with about a 120 grit paper for the smoothest, silkiest surface. However, recent trends in hardwood installation show people taking chains, icepicks, chisels, etc. to the wood before, during and after the staining. This helps create a beautifully comfortable "worn" look. For the record, this can also be achieved if you acquire used hardwood from a demolition or deconstruction. Raleigh's Habitat for Humanity Reuse Center is a great place to buy such things!! Before sanding, you will need to tape off your entryways with plastic sheeting, remove register covers, and stuff them with newspaper filled plastic bags. This will keep you from infiltrating sawdust throughout your entire house.
posted by Raleigh DIY Diva @ 5:13 PM
![]()
![]()

2 Comments:
Interesting take. Post more directions and details.
Nice tips for hardwood refinishing there. Truly helpful for armatures of this field or one who want to do it himself instead of taking professional help.
Post a Comment
<< Home