New Blog Site
Please visit us at www.eppsacurious.blogspot.com
Life has changed a lot and we are no longer DIYing it!
posted by Raleigh DIY Diva @ 11:20 AM
7 comments
![]()
![]()
North Raleigh working mom takes on the role of "DIY Diva" and chronicles the love/hate relationship she and her husband are in with their "foul-tempered old lady of a house."
Please visit us at www.eppsacurious.blogspot.com
posted by Raleigh DIY Diva @ 11:20 AM
7 comments
![]()
![]()
Our house was built in 1981, but it was a custom home and has some very nice extras. One to mention are the solid wood, six panel doors on every interior entryway. Unfortunately, the paint had chipped and yellowed over the years, and the previous owner had used a brush to "touch up" a few areas. As a result, there were visible brush strokes and mismatched paint colors. Not to mention the peeling that occured because PO did not sand and prime! I have nipped that problem in the bud! Using wood putty, patch every hole, ding, or dent and let the putty dry for at least a day. Sand the putty areas smooth and rough up the rest of the door with the sandpaper. This gives the primer a tooth to bite into. Using a small fuzzy paint roller, roll a nice even coat of water based primer on the door and let it dry. Sand with fine grit paper until the door is nice and smooth when you run your hand over it. Use a fresh small fuzzy paint roller to put your first of TWO coats of EXTERIOR semi-gloss latex paint in your color choice. The result is a brush stroke free finish that looks like it was applied at the factory! This process gives you just the right amount of sheen, and works wonderfully for your trim and mouldings, too!!
Labels: Doors, painting, rennovation
posted by Raleigh DIY Diva @ 5:11 PM
0 comments
![]()
![]()
Labels: dropshots, home videography, kids
posted by Raleigh DIY Diva @ 6:39 AM
0 comments
![]()
![]()
posted by Raleigh DIY Diva @ 8:00 PM
0 comments
![]()
![]()
I have so many things going on in my house right now. I am SO trying to git 'er done! Lord have mercy-- I did not know what I was getting myself into! Sometimes I think we may have bitten off more than we can chew, but then again.........
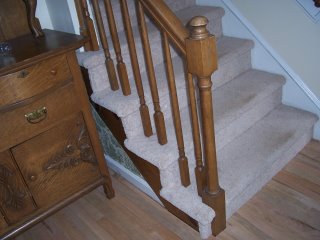
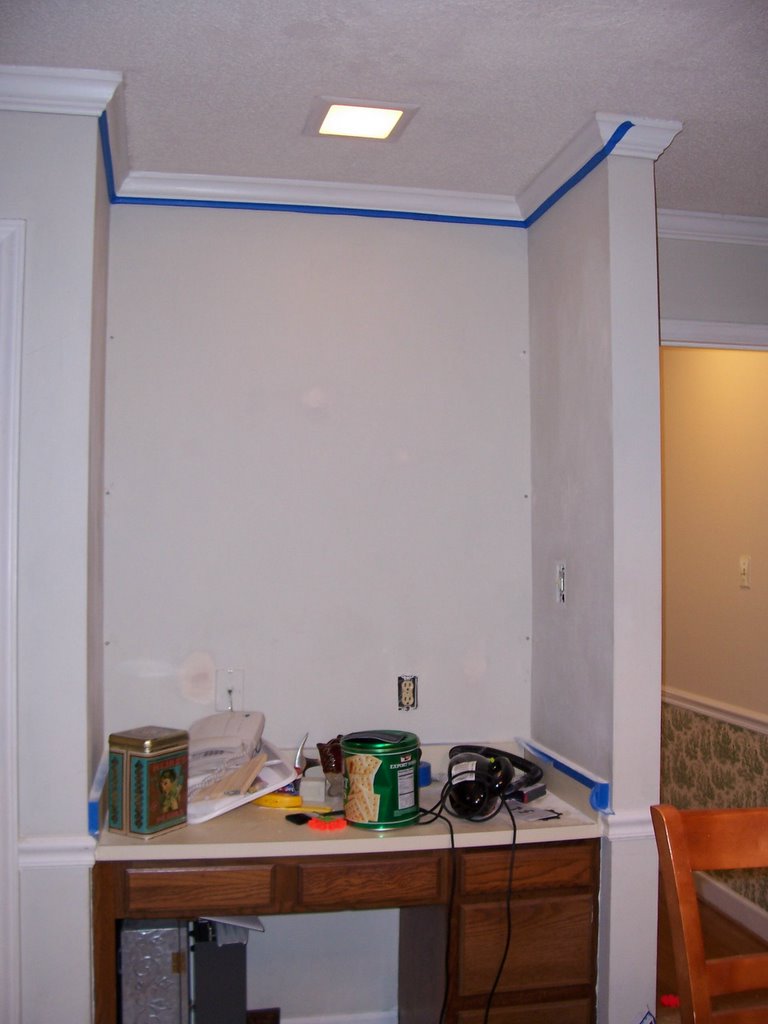
 Now for the pix: The first one is of our mudroom as it looked when we moved in. We put the fridge there, but the walls were beat up and the same chal
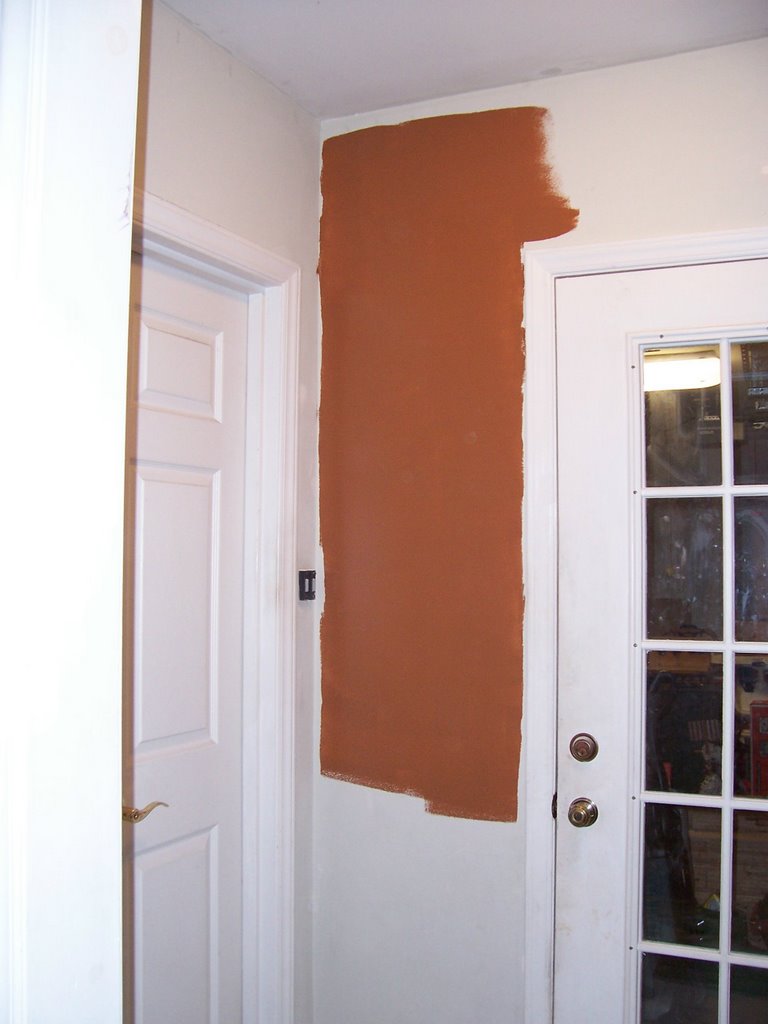 ky, flat, greyish color seen in so many other areas of the house. I selected the most gorgeous deep milk chocolate color (Lowe's American Tradition). It is absolutely intense and rich, and nicely set off by the room's white tile floor, smooth white ceiling, and semi-gloss white trim. The gla
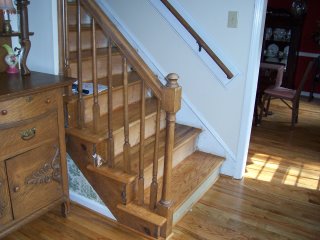
 ss door you see leads out into our two car garage, and the door to the left leads up the stairs to "Daddy's Office," as our boy calls it! It's a fabulous early 90's addition that adds about 1100 square feet to the house, which was originally built without a garage. The place had an ill-placed utility sink which was nice and deep, but you couldn't open the fridge all the way. Plus, 5 feet away is the door to the half bath and another 10 feet away is the kitchen sink!! We decided to remove the utility sink and lived for months with the plumbing exposed. My husband ended up completely re-building the vanity (original to the house) that we removed from the half b
 ath. He placed the new cabinet over the plumbing. Now that it's covered, we have a place to toss shoes and other muck, and any future owners still have the utility si
 nk option. The mudroom is much closer to being finished. The vanity drawers have been modified and added. The "counter top" is a 3/4 inch piece of MDF (medium density fiberboard). I think I will tile the top with some fabulous hand painted Mexican tiles I ordered not so long ago. It will be a nice feature to coordinate with the great shade of brown. I still need to finish painting the trim, and the mudroom will be DONE! I am trying really hard to keep fewer "irons in the fire," and finish what I start. I have a tendency to act upon my creative impulses, even when other things are not complete.
posted by Raleigh DIY Diva @ 7:33 PM
0 comments
![]()
![]()
Hello, out there!! I'd like to give a special SHOUT OUT to www.bejane.com for the EXCELLENT publicity!! I have had more replies to my postings than ever before now that I'm a real Jane! Keep 'em coming! I love reaching people!
posted by Raleigh DIY Diva @ 7:27 PM
0 comments
![]()
![]()
BEFORE:

posted by Raleigh DIY Diva @ 8:01 PM
0 comments
![]()
![]()
I got the following post recently:
posted by Raleigh DIY Diva @ 4:21 PM
4 comments
![]()
![]()
So, what's new in the world of the one and only, Raleigh DIY Diva?? Not much! I just finished painting my little monkey's room a lovely shade of blue-- one of Eddie Bauer's color collection picks-- "Stonewashed" available at Lowe's, in American Tradition Signature Series, Eggshell. Now here's some helpful information. QUESTIONS: 1. How do you choose a paint color?? 2. There is so much out there, but what do I buy? 3. Where do I buy it? 4. Is more expensive better? 5. Can I possibly buy my paint at a big home improvement warehouse and have good results? ANSWERS: 1. Simple- pick a color you like. Take in something you'd like to match. Ask for a second opinion if you have several you like. 2. Buy Ralph Lauren paint at Home Depot, but buy American Tradition at Lowes. 3. Any DIY place 4. NO!! 5. YES!!
posted by Raleigh DIY Diva @ 7:09 PM
4 comments
![]()
![]()
posted by Raleigh DIY Diva @ 6:56 PM
1 comments
![]()
![]()
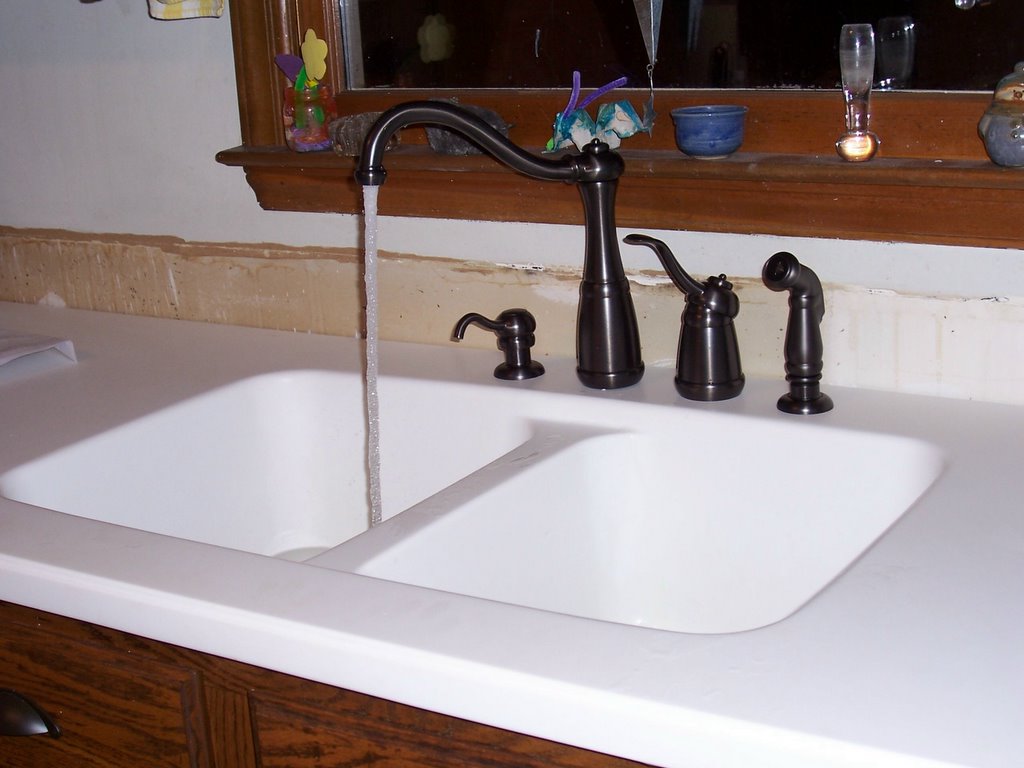
Hello, Raleigh DIY Diva here. Long time, no blog! I have been super busy with things other than the house. All good, though-- I am changing jobs in a couple of months. Same employer, new location. It's a very positive career move, but will limit my DIY time. : >(
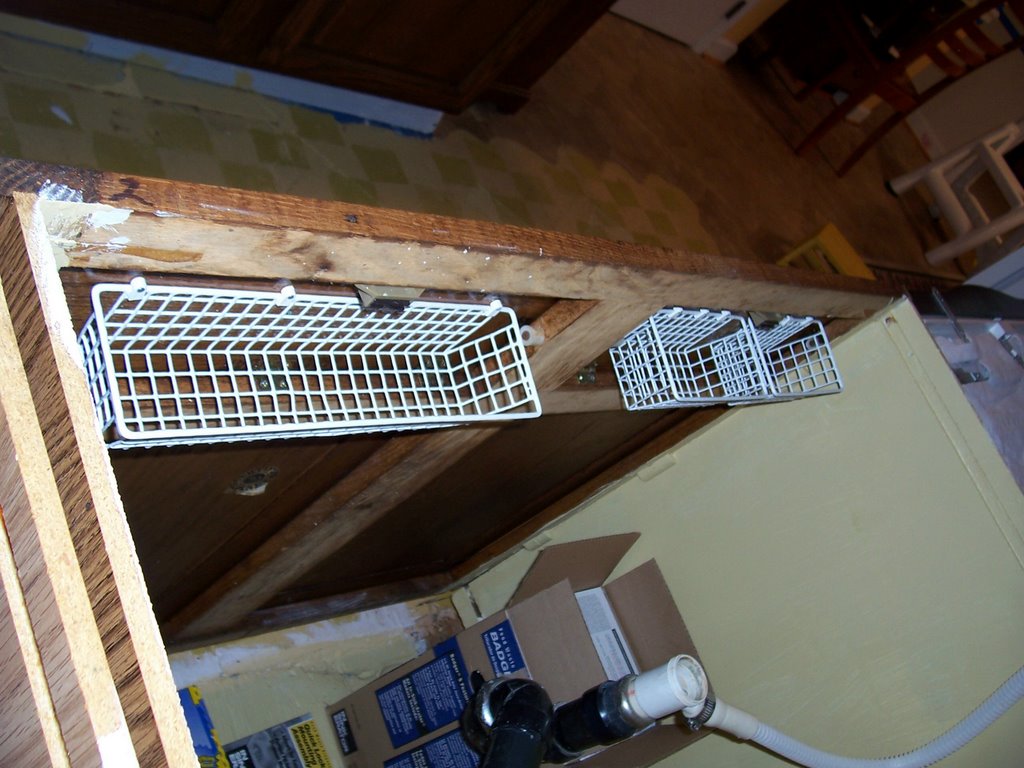 th
th e front of the cabinets and outfitted them with a hidden basket for holding sink sponges and drain plugs! It's cool, because I like being able to stash such things away, and most newer kitchens have such commodities. Check it out!!
posted by Raleigh DIY Diva @ 2:24 PM
0 comments
![]()
![]()
We are still working on getting the hardwood flooring installed in our kitchen. It has been a long, yet rewarding process. I really think this is because you can "see" your progress! You work and work, and it takes forever--yet line by line, you see your efforts paying off!! I have run into a couple of design issues. The island that was in the kitchen originally was modified by the PO. BLEH! Although it has solid oak doors just like the cabinets, the sides and back were faux oak. Over this, the PO secured cabinet grade plywood, but didn't do a very good job of it. It was stained by the PO in an effort to match the oak doors, but ALAS-- PO was obviously color blind! I painted the sides and back, then decided to just get rid of it. I drug it out into the garage, bought a lovely, distressed, furniture style kitchen island, and installed it. Now, I am thinking of taking that back to the store, and re-working the original island. WHEW!
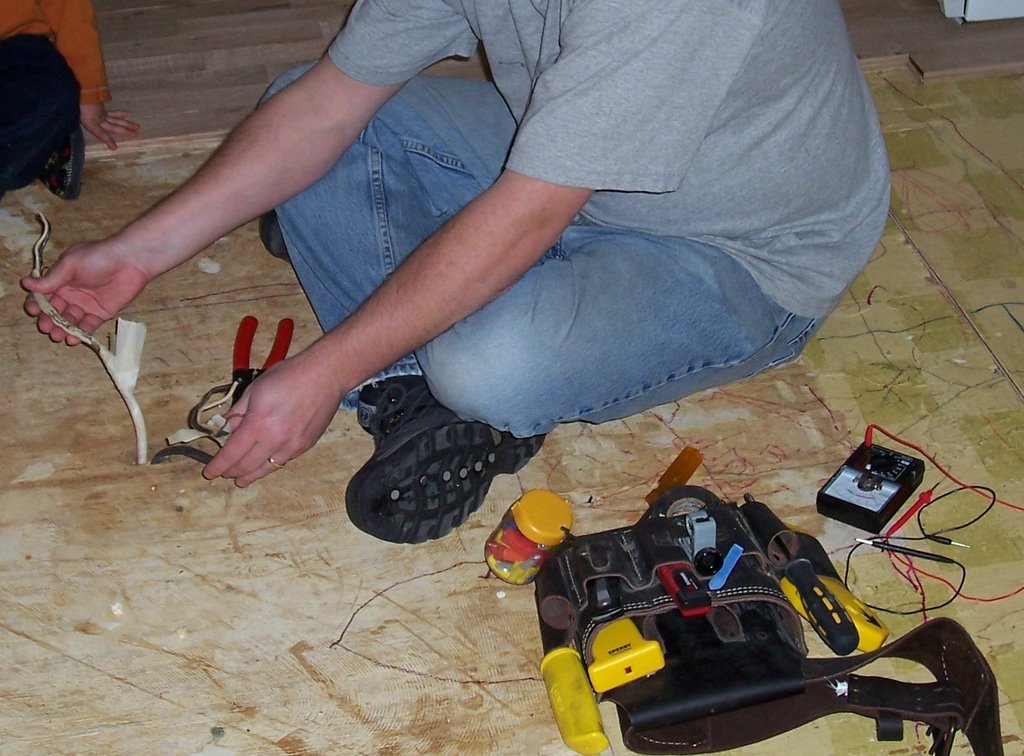 Also, back to the hardwood-- upon removing the original island in order to place flooring under it, we discovered a random colle
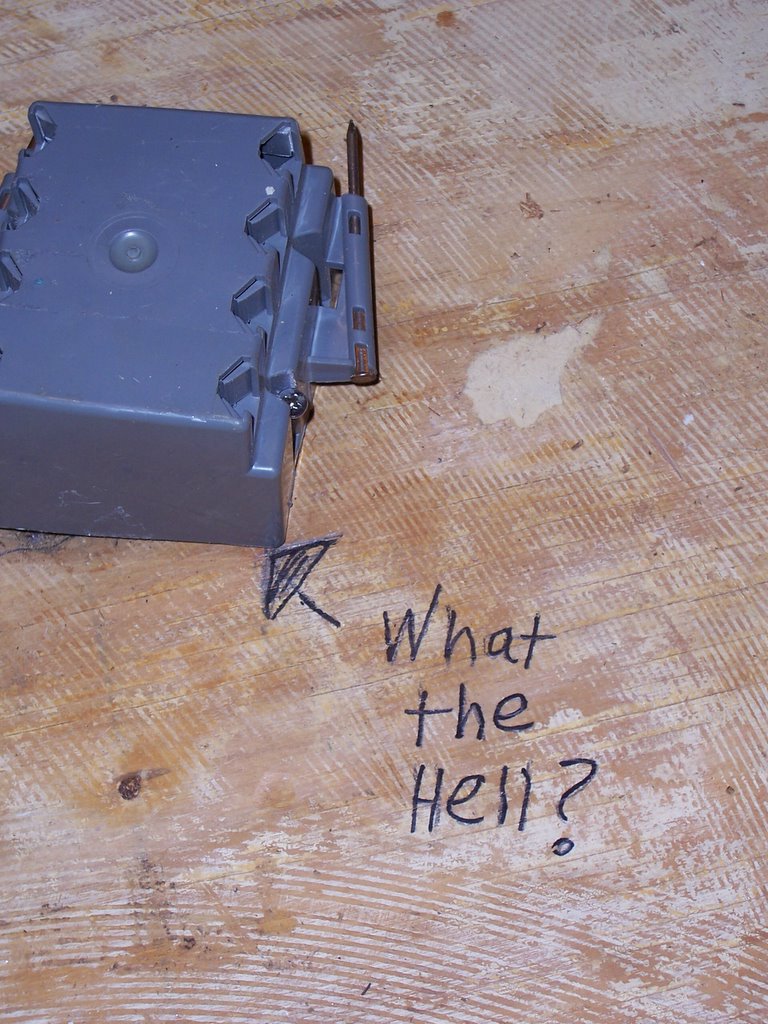 ction of LIVE WIRES-- hanging out of a box, yet unattached to an outlet--and with NO wire nuts. Any slight brush against them would have resulted in an unpleasant jolt for sure! In an effort to properly wire in an outlet, we shut the power off and began to test the wires. PO strikes again! We realized that the standard house wires had been spliced and driven up through a hole in the kitchen floor (the second hole, actually-- PO's first hole ran him into a joist, so he just moved over and drilled another hole) in an attempt to install an outlet under the island. Because of this odd splice, we HAD to immediately rewire the outlet, or the fridge wouldn't work. PO just stuck random wires, outlets, plugs, and breakers wherever the Spirit moved him to do so! Fire hazard creatin' fool!
posted by Raleigh DIY Diva @ 2:20 PM
0 comments
![]()
![]()
OK- so you've discovered that the odor you thought was "musty old house needs painting" is actually "eau de rotten subfloor." This obviously pushes replacing the floor to the top of your DIY list. What's the old Yiddish proverb? "If you want to make God laugh, tell Him your plans." Same thing with This Old House-- we had PLANNED to start at the top and work our way down-- painting molding, walls, baseboards and replacing the island, counter tops, and appliances. However, the dishwasher that came with the house threw a monkey wrench in our plans by rotting the floor right out from under the five layers of various patterned vinyl. (see previous blogs for refresher photos) If you're gonna do something, you may as well do it to the best of your ability with the best material you can afford. In a house with a subfloor and crawlspace, wood, tile, or vinyl is the best choice. Pouring concrete may not be a good idea, as your foundation/subfloor is most likely not designed to support the weight. Side note-- when replacing counters but keeping original cabinetry in an older home, think long and hard about selecting granite. You absolutely MUST make sure the cabinets can support the tremendous weight of a few slabs of granite. Consult a professional if you're even slightly concerned. In our case, vinyl was most definitely NOT an option. We also did not consider pre-finished wood (although we have installed that in a previous home of ours) or laminate because we appreciate the beauty and durability of natural materials. The obvious option was to install virgin tongue and groove hardwood--plank by plank. We chose a beautifully patterned red oak. The material itself costs at least $2.00 a square foot wholesale and labor costs at least twice that, and we have around 500 square feet we'd like to cover. It was either DIY or DWO (do without)! We hauled the flooring bundles in our trusty Yuppie SUV and dropped about $300.oo for a Stanley-Bostitch Hardwood Flooring Nailer. It's this yellow, oddly shaped monstrosity that is designed so that one person can operate it. NEWSFLASH Stanley-Bostitch: That is OVERLY ambitious, even for this DIY Diva!! It takes me using both hands to hold the thing, now dubbed "Old Yeller," and my husband posing as a lu
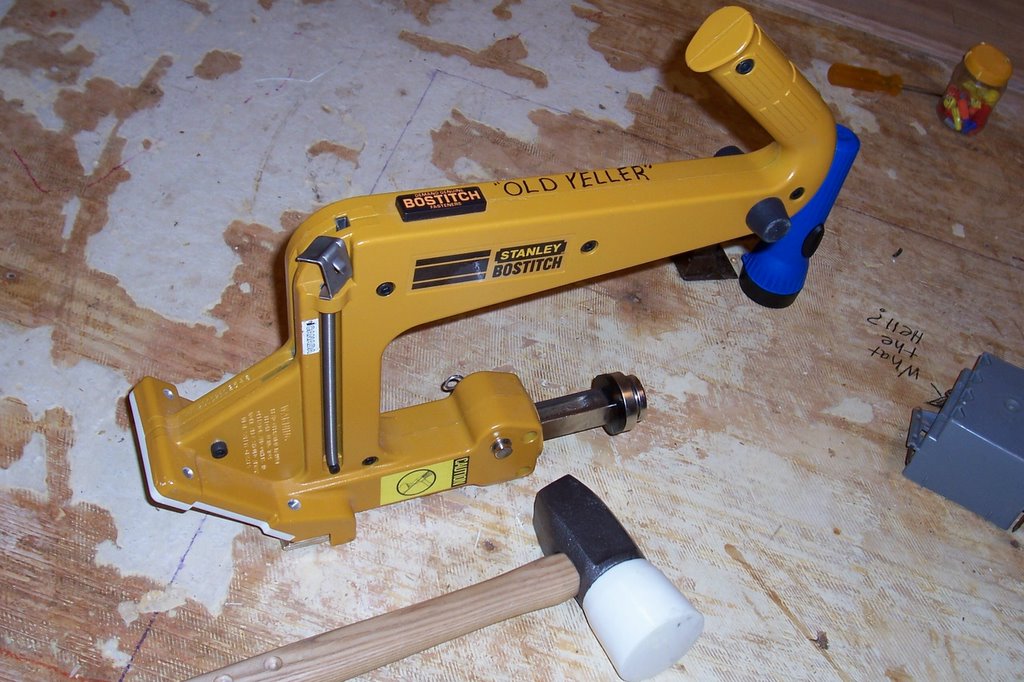 mberjack to wack the living hell out of it in a effort to drive the unreasonably dull, two-inch "flooring cleats" through the tongue and into the subfloor. (PANT PANT, it wears me out just typing about it!!) You must use a reciprocating saw to trim out the door frames in order to get the hardwood under the door frame and achieve the "built in look" as opposed to an obvious "retro-fit." Having a chisel handy helps, too.
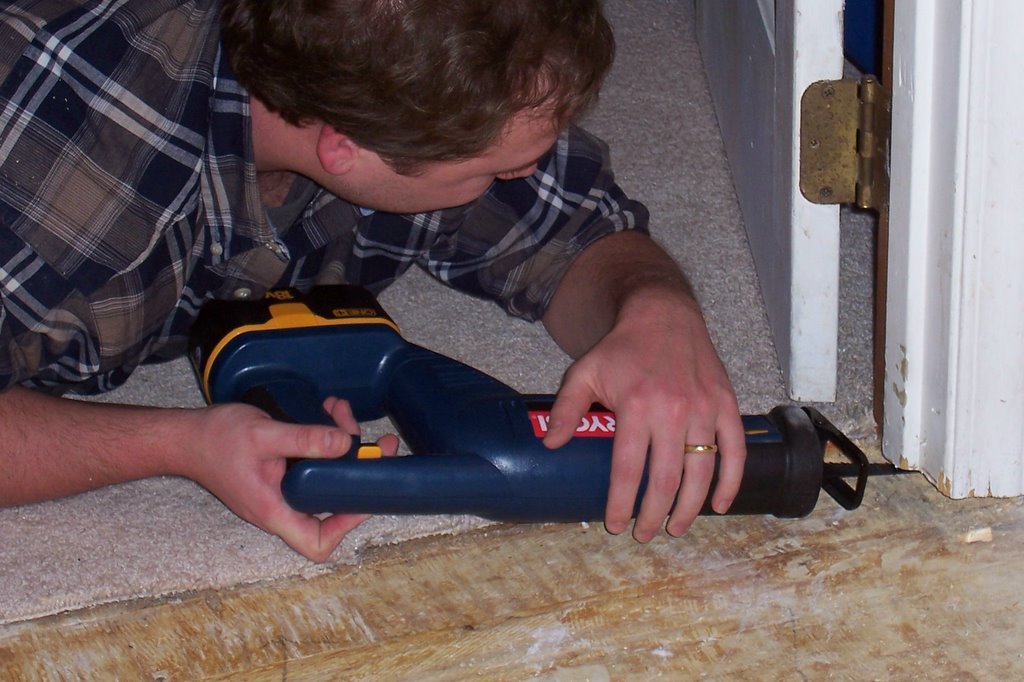 tagger the seams throughout, and use a 6 to 8 inch length of the hardwood as a "banging block" for a rubber mallet. Use the mallet and block to bang the groove of one board onto the tongue of the previously nailed board. Have a flat headed screwdriver, prybar, tape measure, and box of bandaids available. Proceed across the floor taking care to get seams as tight as possible, as wooden flooring expands a contracts daily. Eventually, your floor will "settle" into its comfort zone. Use a miter saw for cutting straight lines and angles, use a table or jigsaw for cutting shapes or notches, use a Dremel Drill with a cutting bit for cutting the heads off of flooring cleats that don't go all the way in (hey, it happens). If you're "saw poor" already, a reciprocating saw can be a cumbersome but somewhat acceptable substitution for a more expensive jigsaw or table saw. Once the flooring is ins
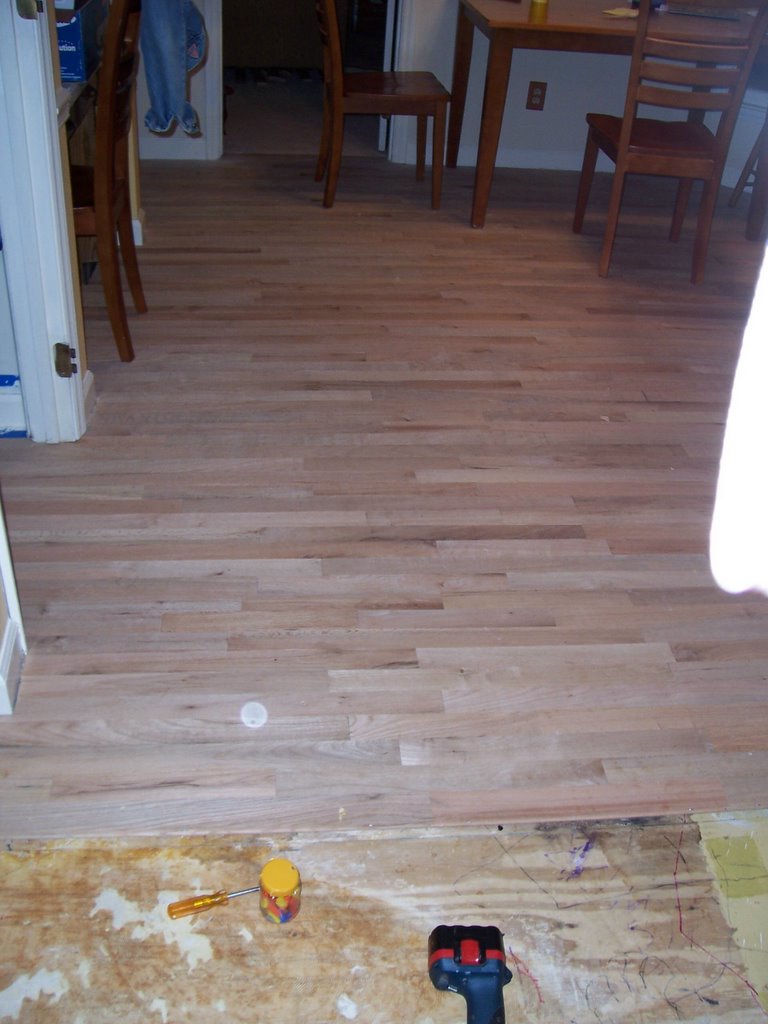 talled, rent a floor sander and go over the entire surface with a 50 grit floor sandpaper, then an 80 grit at the least. Some recommend finishing with about a 120 grit paper for the smoothest, silkiest surface. However, recent trends in hardwood installation show people taking chains, icepicks, chisels, etc. to the wood before, during and after the staining. This helps create a beautifully comfortable "worn" look. For the record, this can also be achieved if you acquire used hardwood from a demolition or deconstruction. Raleigh's Habitat for Humanity Reuse Center is a great place to buy such things!! Before sanding, you will need to tape off your entryways with plastic sheeting, remove register covers, and stuff them with newspaper filled plastic bags. This will keep you from infiltrating sawdust throughout your entire house.
posted by Raleigh DIY Diva @ 5:13 PM
2 comments
![]()
![]()
Hey DIYers! Back again, and still trying to catch you up on our ambitions. Some might say that we have "too many irons in the fire," but when an idea comes to mind, I can't help but act on it! I am starting to think that I am into instant gratification. M
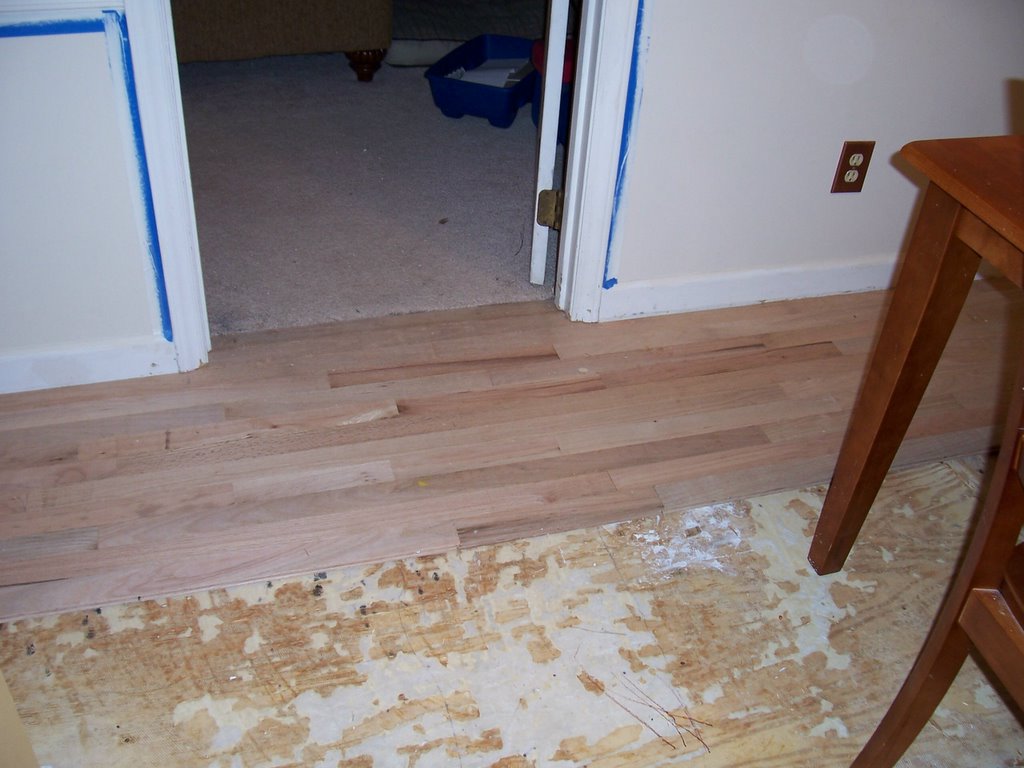 y hubby has pretty much accepted the fact that if something doesn't suit me, I will take a saw or sledge hammer to it! You should see the miter saw I got for my 30th birthday!! If my real job just wouldn't get in the way, I'd have everything done. A new friend of mine said, "When I first met you, I assumed you were a prissy little sorority girl. When I heard about your tool collection, I was impressed!" Boy do I love proving people wrong!! Anyhow, I guess we'll just keep plugging along until This Old House becomes My Dream House. I am beginning to see glimpses of My Dream Kitchen shining through the unfinished backsplash and bare subfloor. Speaking of which, the subfloor is one lovely thing, I'll tell ya! Here, you can see the beginning of our self installation of virgin red oak hardwood flooring. This is gorgeous stuff! We have nailed it plank by plank and are plugging right across the "ugly ugly floor" as our kiddo calls it. Once it's finished, we will have to s
posted by Raleigh DIY Diva @ 4:41 PM
0 comments
![]()
![]()
Your Raleigh DIY Diva has been out for a few days, with other things on her plate-- namely her REAL job!! But, here I am back in the swing of things, and ready to share more of The Adventures of This Old House! When we moved in, the kitchen (which is the bulk of our current project) appeared to have never been cleaned in the 25 years that it had existed. I took one of those super duper enchanted thingies called the Mr. Clean Magic Eraser, wet it down, and swiped it across the formica island top. I was under the impression that the formica, original to the house, was a tannish color. However, the magic eraser revealed that the formica was actually more of an early 80's off white almond color! YUCKY! Here's a photo of the original counter top:
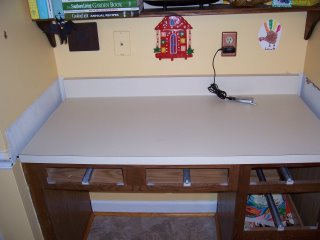
Granted, the drawers of the kitchen desk were out, and the formica backsplash had been removed. Also, the lovely top layer of peel and stick vinyl is still visible on the floor! Just before Christmas, I got what old timers might call a "windfall." No, I did not win the lottery or find a bank account I had forgotten about-- I had a conversation with a friend! She and her husband had decided to upgrade their kitchen counters to a gorgeous hand selected, imported Brazilian Granite. (If you saw it, you'd know why I capitalized both words!) I asked her about the Corian she was removing, and she said they would have to pay the builder to dispose of it. I told her I'd pay her for it, and she refused-- just telling me to come pick it up!! With the help of a co-worker and her husband's truck, I picked up the counter tops-- Corian sink included-- and transported them from Cary, NC, to North Raleigh in the dark and driving rain. Enter Rob, owner of Elite Countertops. What an awesome guy! Even though selling me
 new material would be tons more profitable for him, he agreed to re-fabricate the Corian and install it in my much smaller kitchen. It looks GREAT! I chose a beautiful European styled Price Pfister Pfaucet (HA HA) and paid about 1/4 the price of the estimate I got for installation of NEW Corian!! Since it is solid surface and is completely re-usable, it looks like I am the first owner of it! Glacier White, and Gorgeous!! To thank the friend who gave us the Corian, we made a nice donation to Habitat for Humanity. She was thrilled!
posted by Raleigh DIY Diva @ 6:17 PM
2 comments
![]()
![]()
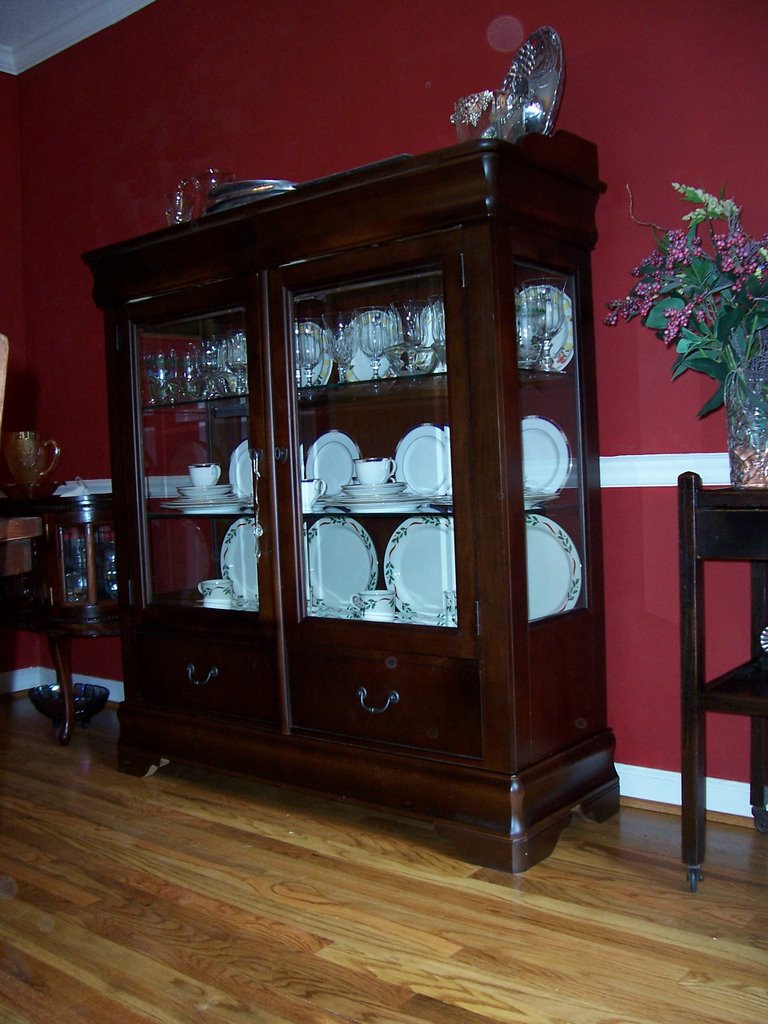
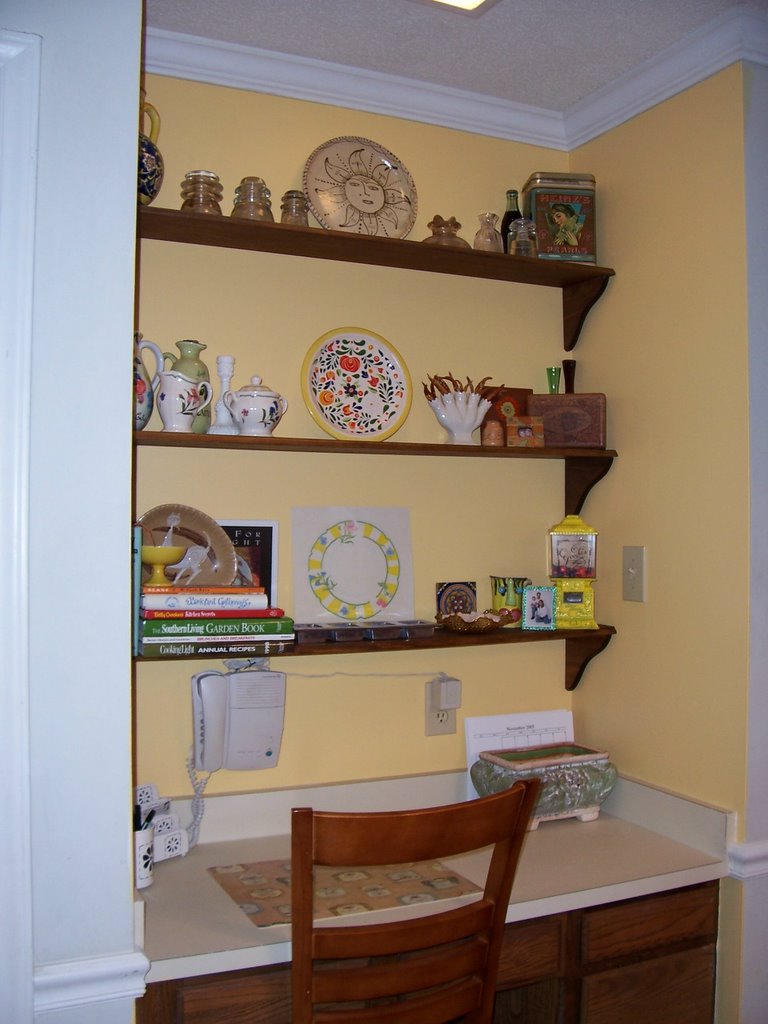 sales, and estate sales. Pretty cool way to display things I like a lot!
posted by Raleigh DIY Diva @ 12:17 PM
0 comments
![]()
![]()
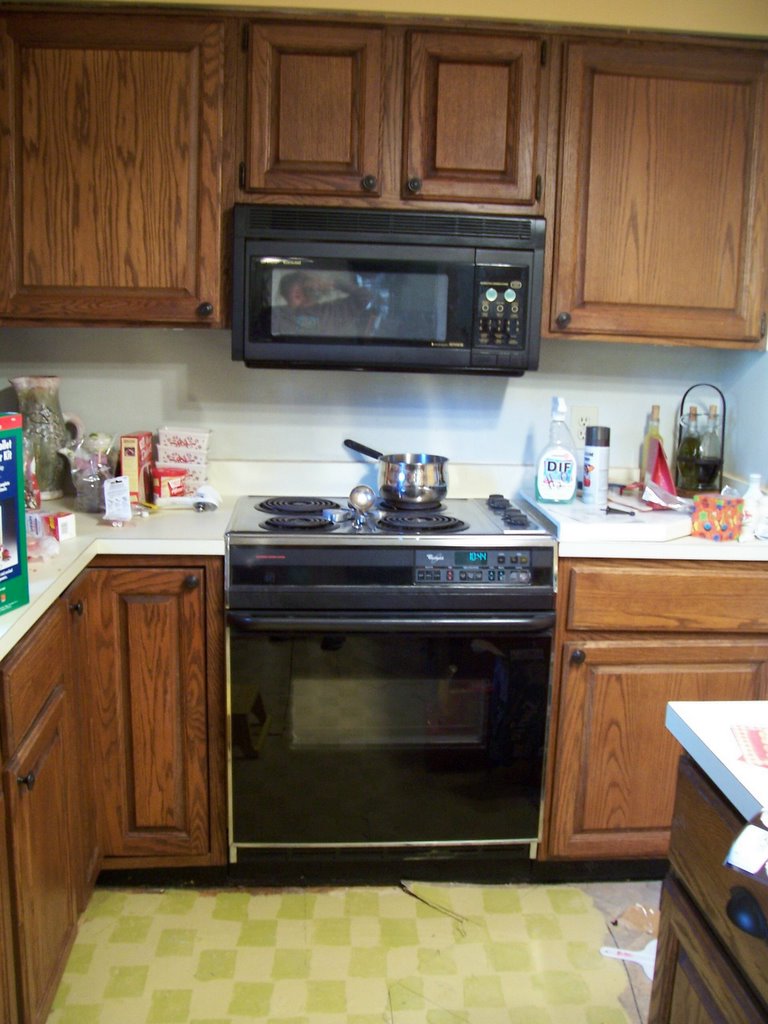
Kitchen cabinets. Can't live without 'em. What to do when your budget is tight, and you are doing pretty much everything yourself (as much because you can't afford to hire someone as because you enjoy it)? Well, you can give cabinets a f
 acelift by adding molding, new stain, a faux finish, or a paint job. You can also add modern touches, like removing a center panel and having glass cut to make an attractive display space. This is what we did in our previous house. A plug intended for the microwave allowed us to light the inside of the cabinet with a plug-in under cabinet light. Our new (old) kitchen does not allow for this, really. The cabinets are solid oak, which is cool. In the early 80's, it was fashionable to have cabinets and drawers with NO hardware. The result? Filthy cabinets and drawers. I need KNOBS!! Always looking for a deal, I consulted Ebay and found gorgeous, simple, Restoration Hardware brand knobs and cup pulls in Oiled Bronze. $1.95 each as opposed to $5.95 each in the store! Instant uplift for cabinets, which I had also refinished using Old English and a lot of elbow grease!
posted by Raleigh DIY Diva @ 8:02 PM
0 comments
![]()
![]()

posted by Raleigh DIY Diva @ 7:50 PM
0 comments
![]()
![]()
posted by Raleigh DIY Diva @ 7:39 PM
0 comments
![]()
![]()
Once the rotten subfloor was discovered, we pulled up all the vinyl around the damaged area and were happy to discover that the subfloor was made from cabinet grade plywood rather than today's builders choice of particle board. I simply exposed all of the damaged area, set a circular saw to 3/4 inch
 heavy (for newbies, that means a fraction of an eyelash past 3/4 of an inch
  for the blade height), and cut out the rotted wood. This exposed the vapor barrier, which I replaced. On top of the new barrier, I measured, cut, and screwed down a cabinet grade plywood "patch." This worked perfectly and eliminated the faint stench that we had been assuming was "musty old house needs painting" scent. Yee- Haa!
posted by Raleigh DIY Diva @ 7:00 PM
1 comments
![]()
![]()
North Raleigh working mom takes on the role of "DIY Diva" and chronicles the love/hate relationship she and her husband are in with their "foul-tempered old lady of a house."
