Raleigh DIY Diva

North Raleigh working mom takes on the role of "DIY Diva" and chronicles the love/hate relationship she and her husband are in with their "foul-tempered old lady of a house."

Monday, February 20, 2006

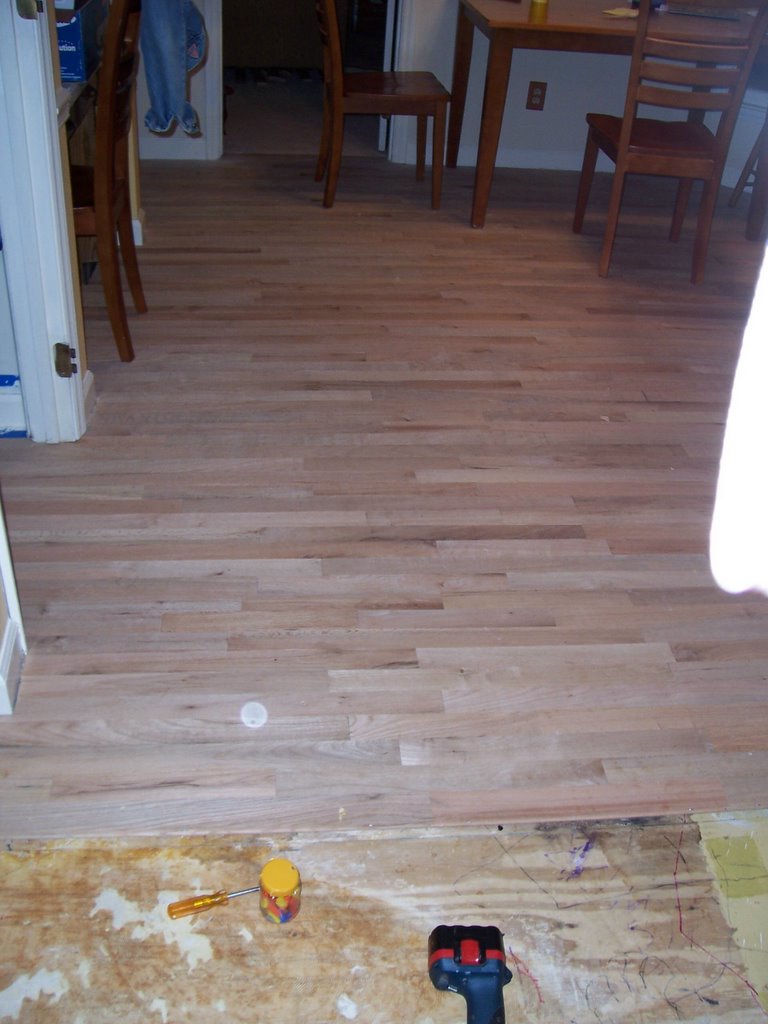
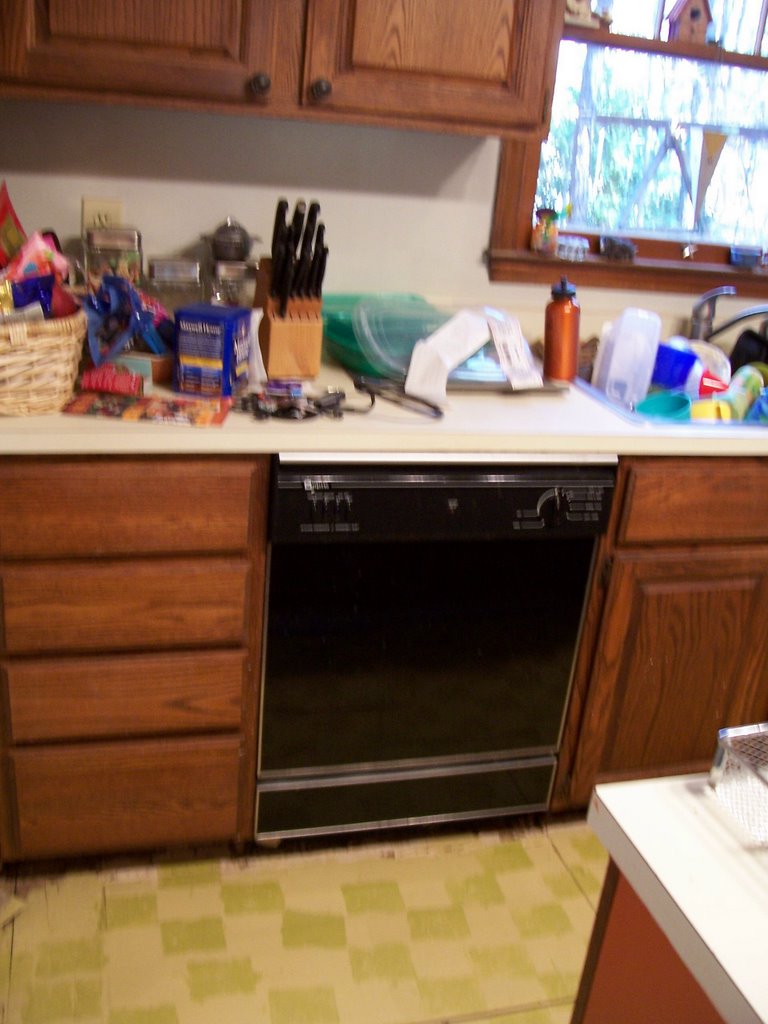
Hardwood flooring still in process!

We are still working on getting the hardwood flooring installed in our kitchen. It has been a long, yet rewarding process. I really think this is because you can "see" your progress! You work and work, and it takes forever--yet line by line, you see your efforts paying off!! I have run into a couple of design issues. The island that was in the kitchen originally was modified by the PO. BLEH! Although it has solid oak doors just like the cabinets, the sides and back were faux oak. Over this, the PO secured cabinet grade plywood, but didn't do a very good job of it. It was stained by the PO in an effort to match the oak doors, but ALAS-- PO was obviously color blind! I painted the sides and back, then decided to just get rid of it. I drug it out into the garage, bought a lovely, distressed, furniture style kitchen island, and installed it. Now, I am thinking of taking that back to the store, and re-working the original island. WHEW! 
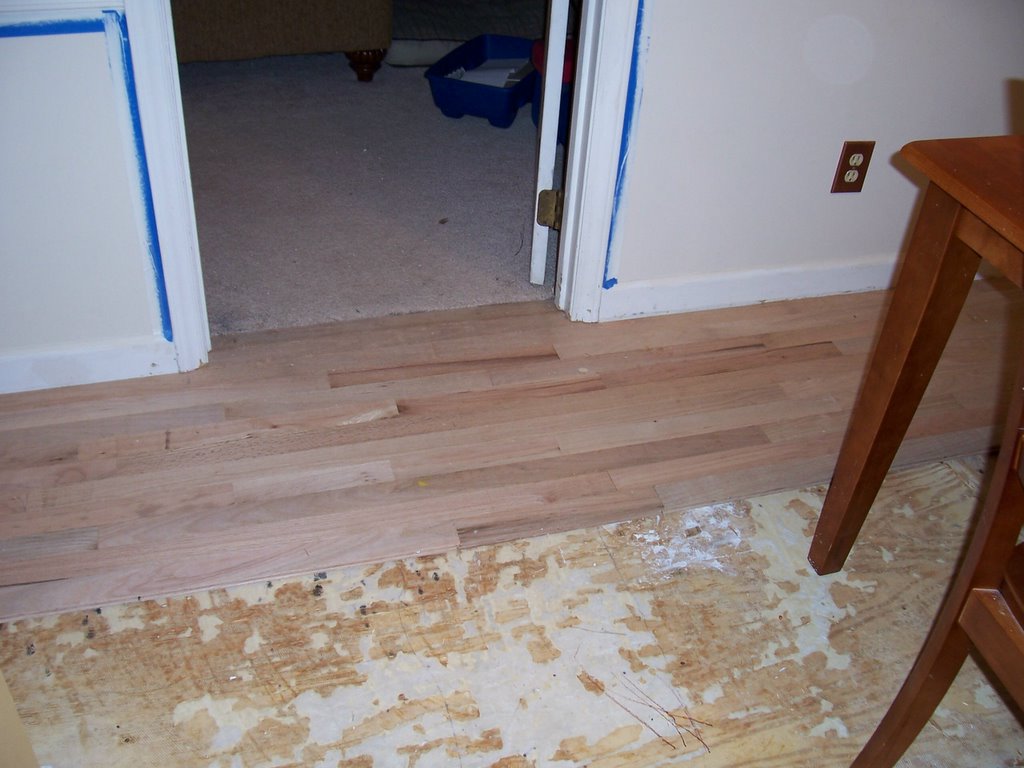
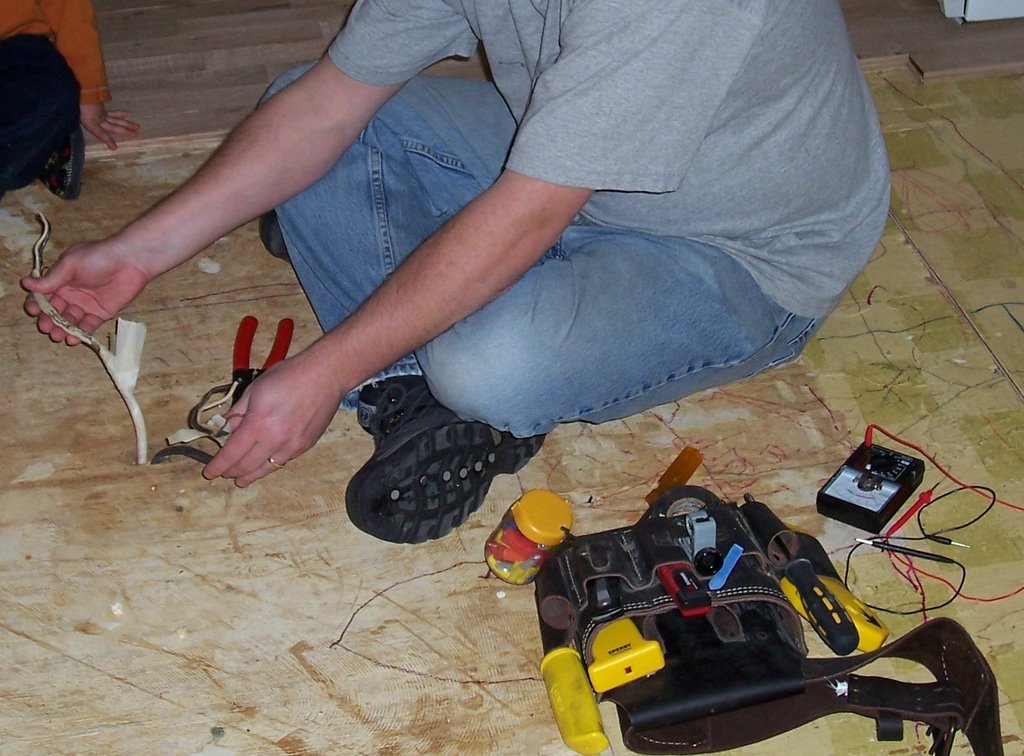
Also, back to the hardwood-- upon removing the original island in order to place flooring under it, we discovered a random colle
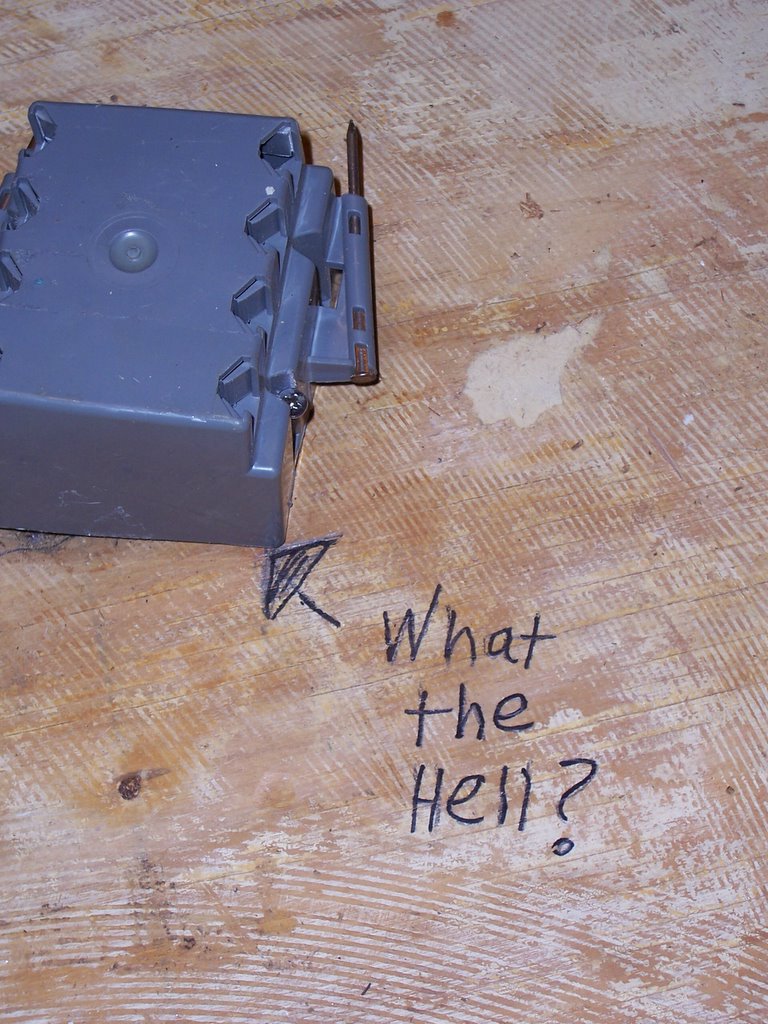
ction of LIVE WIRES-- hanging out of a box, yet unattached to an outlet--and with NO wire nuts. Any slight brush against them would have resulted in an unpleasant jolt for sure! In an effort to properly wire in an outlet, we shut the power off and began to test the wires. PO strikes again! We realized that the standard house wires had been spliced and driven up through a hole in the kitchen floor (the second hole, actually-- PO's first hole ran him into a joist, so he just moved over and drilled another hole) in an attempt to install an outlet under the island. Because of this odd splice, we HAD to immediately rewire the outlet, or the fridge wouldn't work. PO just stuck random wires, outlets, plugs, and breakers wherever the Spirit moved him to do so! Fire hazard creatin' fool!

Friday, February 10, 2006

Hardwood Flooring: Refinishing or Installing-- How To DIY!!

OK- so you've discovered that the odor you thought was "musty old house needs painting" is actually "eau de rotten subfloor." This obviously pushes replacing the floor to the top of your DIY list. What's the old Yiddish proverb? "If you want to make God laugh, tell Him your plans." Same thing with This Old House-- we had PLANNED to start at the top and work our way down-- painting molding, walls, baseboards and replacing the island, counter tops, and appliances. However, the dishwasher that came with the house threw a monkey wrench in our plans by rotting the floor right out from under the five layers of various patterned vinyl. (see previous blogs for refresher photos) If you're gonna do something, you may as well do it to the best of your ability with the best material you can afford. In a house with a subfloor and crawlspace, wood, tile, or vinyl is the best choice. Pouring concrete may not be a good idea, as your foundation/subfloor is most likely not designed to support the weight. Side note-- when replacing counters but keeping original cabinetry in an older home, think long and hard about selecting granite. You absolutely MUST make sure the cabinets can support the tremendous weight of a few slabs of granite. Consult a professional if you're even slightly concerned. In our case, vinyl was most definitely NOT an option. We also did not consider pre-finished wood (although we have installed that in a previous home of ours) or laminate because we appreciate the beauty and durability of natural materials. The obvious option was to install virgin tongue and groove hardwood--plank by plank. We chose a beautifully patterned red oak. The material itself costs at least $2.00 a square foot wholesale and labor costs at least twice that, and we have around 500 square feet we'd like to cover. It was either DIY or DWO (do without)! We hauled the flooring bundles in our trusty Yuppie SUV and dropped about $300.oo for a Stanley-Bostitch Hardwood Flooring Nailer. It's this yellow, oddly shaped monstrosity that is designed so that one person can operate it. NEWSFLASH Stanley-Bostitch: That is OVERLY ambitious, even for this DIY Diva!! It takes me using both hands to hold the thing, now dubbed "Old Yeller," and my husband posing as a lumberjack to wack the living hell out of it in a effort to drive the unreasonably dull, two-inch "flooring cleats" through the tongue and into the subfloor. (PANT PANT, it wears me out just typing about it!!) You must use a reciprocating saw to trim out the door frames in order to get the hardwood under the door frame and achieve the "built in look" as opposed to an obvious "retro-fit." Having a chisel handy helps, too.
Once you have trimmed your doorways, you are ready to lay your flooring. In all honesty, you should probably drop a plumb line and start in the center of your flooring-- but let's get real-- we started at the door. Work with the tongue going away from you, stagger the seams throughout, and use a 6 to 8 inch length of the hardwood as a "banging block" for a rubber mallet. Use the mallet and block to bang the groove of one board onto the tongue of the previously nailed board. Have a flat headed screwdriver, prybar, tape measure, and box of bandaids available. Proceed across the floor taking care to get seams as tight as possible, as wooden flooring expands a contracts daily. Eventually, your floor will "settle" into its comfort zone. Use a miter saw for cutting straight lines and angles, use a table or jigsaw for cutting shapes or notches, use a Dremel Drill with a cutting bit for cutting the heads off of flooring cleats that don't go all the way in (hey, it happens). If you're "saw poor" already, a reciprocating saw can be a cumbersome but somewhat acceptable substitution for a more expensive jigsaw or table saw. Once the flooring is installed, rent a floor sander and go over the entire surface with a 50 grit floor sandpaper, then an 80 grit at the least. Some recommend finishing with about a 120 grit paper for the smoothest, silkiest surface. However, recent trends in hardwood installation show people taking chains, icepicks, chisels, etc. to the wood before, during and after the staining. This helps create a beautifully comfortable "worn" look. For the record, this can also be achieved if you acquire used hardwood from a demolition or deconstruction. Raleigh's Habitat for Humanity Reuse Center is a great place to buy such things!! Before sanding, you will need to tape off your entryways with plastic sheeting, remove register covers, and stuff them with newspaper filled plastic bags. This will keep you from infiltrating sawdust throughout your entire house.

Hardwood Oak Flooring Has Class!!

Hey DIYers! Back again, and still trying to catch you up on our ambitions. Some might say that we have "too many irons in the fire," but when an idea comes to mind, I can't help but act on it! I am starting to think that I am into instant gratification. My hubby has pretty much accepted the fact that if something doesn't suit me, I will take a saw or sledge hammer to it! You should see the miter saw I got for my 30th birthday!! If my real job just wouldn't get in the way, I'd have everything done. A new friend of mine said, "When I first met you, I assumed you were a prissy little sorority girl. When I heard about your tool collection, I was impressed!" Boy do I love proving people wrong!! Anyhow, I guess we'll just keep plugging along until This Old House becomes My Dream House. I am beginning to see glimpses of My Dream Kitchen shining through the unfinished backsplash and bare subfloor. Speaking of which, the subfloor is one lovely thing, I'll tell ya! Here, you can see the beginning of our self installation of virgin red oak hardwood flooring. This is gorgeous stuff! We have nailed it plank by plank and are plugging right across the "ugly ugly floor" as our kiddo calls it. Once it's finished, we will have to stain it to match our home's existing hardwood as closely as possible. We plan to extend the oak into the dining and family rooms which are currently carpeted. I am certain that the hardwood flooring will increase the beauty, comfort, and value of our home. The second photo shows the transition between the newly installed unfinished flooring and the original oak from 1981. It's a lovely color, and we hope to be able to match it closely. We will lay and stain oak reducer strips to transition the new wood to the old wood, as they are not quite level. Honestly, I am tempted to put new wood over the existing wood, but my team mate is not on board for that!! Coming up: Finding the gumption to install your own wooden flooring and how to do it!!

Thursday, February 09, 2006

Formica becomes Solid Surface! YEA! February 9, 2006

Your Raleigh DIY Diva has been out for a few days, with other things on her plate-- namely her REAL job!! But, here I am back in the swing of things, and ready to share more of The Adventures of This Old House! When we moved in, the kitchen (which is the bulk of our current project) appeared to have never been cleaned in the 25 years that it had existed. I took one of those super duper enchanted thingies called the Mr. Clean Magic Eraser, wet it down, and swiped it across the formica island top. I was under the impression that the formica, original to the house, was a tannish color. However, the magic eraser revealed that the formica was actually more of an early 80's off white almond color! YUCKY! Here's a photo of the original counter top:

Granted, the drawers of the kitchen desk were out, and the formica backsplash had been removed. Also, the lovely top layer of peel and stick vinyl is still visible on the floor! Just before Christmas, I got what old timers might call a "windfall." No, I did not win the lottery or find a bank account I had forgotten about-- I had a conversation with a friend! She and her husband had decided to upgrade their kitchen counters to a gorgeous hand selected, imported Brazilian Granite. (If you saw it, you'd know why I capitalized both words!) I asked her about the Corian she was removing, and she said they would have to pay the builder to dispose of it. I told her I'd pay her for it, and she refused-- just telling me to come pick it up!! With the help of a co-worker and her husband's truck, I picked up the counter tops-- Corian sink included-- and transported them from Cary, NC, to North Raleigh in the dark and driving rain. Enter Rob, owner of Elite Countertops. What an awesome guy! Even though selling me

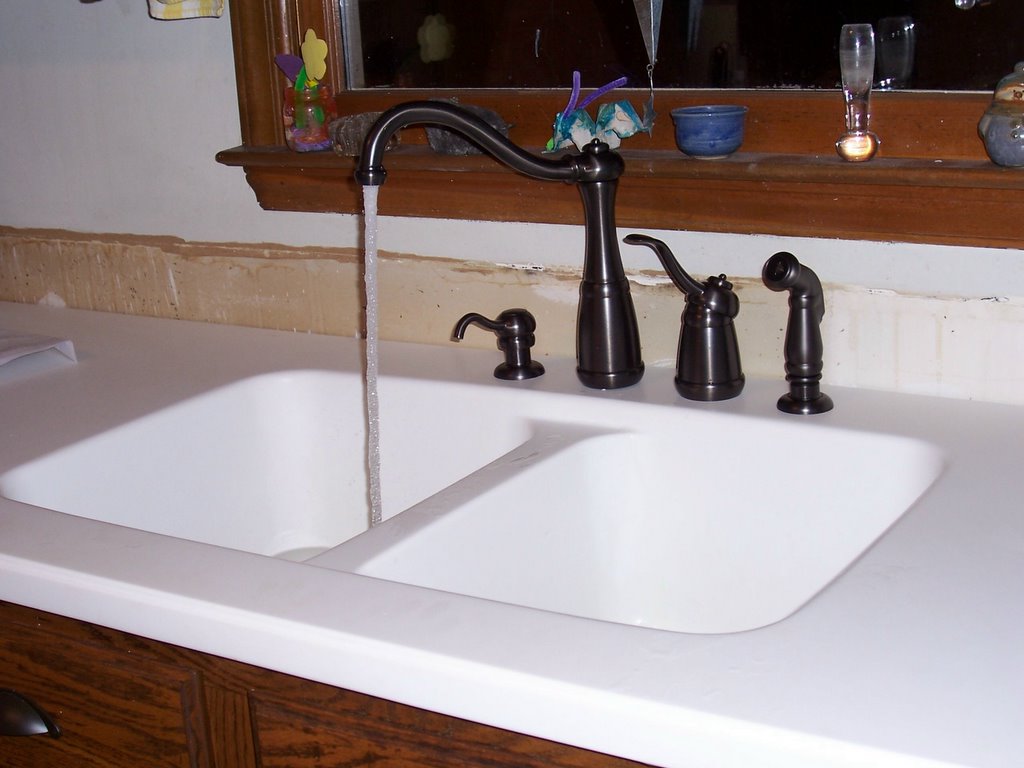
new material would be tons more profitable for him, he agreed to re-fabricate the Corian and install it in my much smaller kitchen. It looks GREAT! I chose a beautiful European styled Price Pfister Pfaucet (HA HA) and paid about 1/4 the price of the estimate I got for installation of NEW Corian!! Since it is solid surface and is completely re-usable, it looks like I am the first owner of it! Glacier White, and Gorgeous!! To thank the friend who gave us the Corian, we made a nice donation to Habitat for Humanity. She was thrilled!
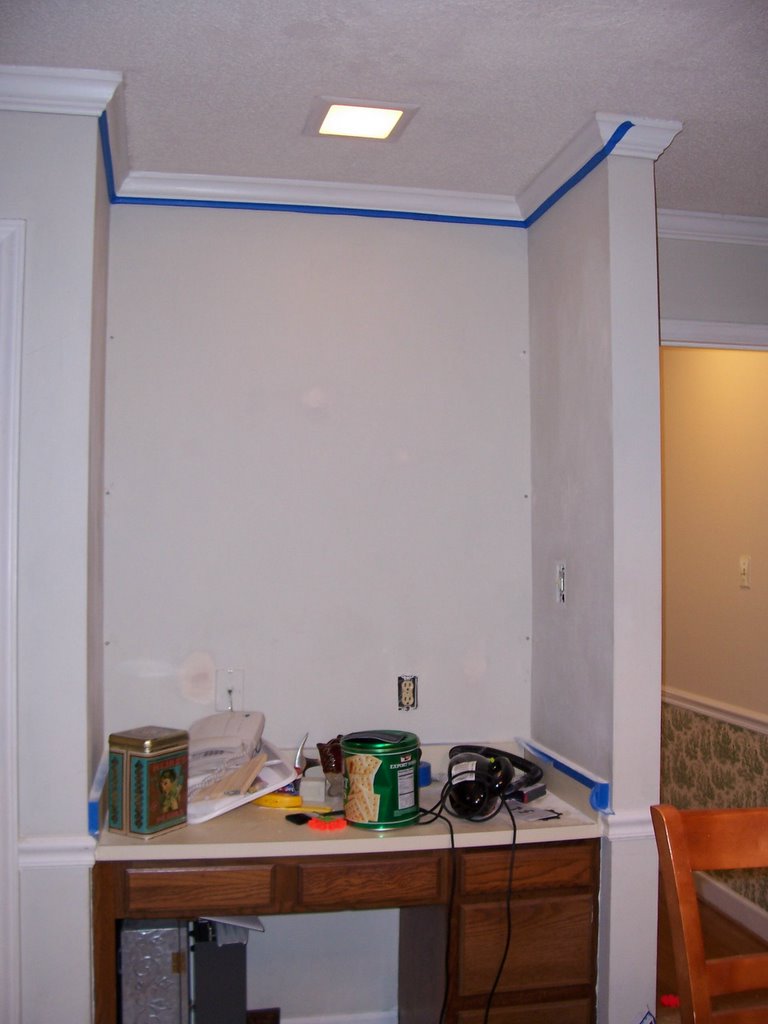
Sunday, February 05, 2006

Kitchen Desk: Raleigh DIY Diva- February 5, 2006


Among many things that need updating in the kitchen was the desk area. I have always wanted a built in kitchen desk for paying bills, using the phone, and displaying family photos. The PO had owned this house for just under 25 years, and never used the space effectively. The first photo shows how it looked when we moved in, and the second photo shows the shelves I built and stained to match the cabinetry. The display items are mostly "found" items-- antique stores, yard sales, and estate sales. Pretty cool way to display things I like a lot!

Thursday, February 02, 2006

Cabinet Refacing, Replacing, or Re-Creating? Raleigh DIY Diva- February 2, 2006

Kitchen cabinets. Can't live without 'em. What to do when your budget is tight, and you are doing pretty much everything yourself (as much because you can't afford to hire someone as because you enjoy it)? Well, you can give cabinets a facelift by adding molding, new stain, a faux finish, or a paint job. You can also add modern touches, like removing a center panel and having glass cut to make an attractive display space. This is what we did in our previous house. A plug intended for the microwave allowed us to light the inside of the cabinet with a plug-in under cabinet light. Our new (old) kitchen does not allow for this, really. The cabinets are solid oak, which is cool. In the early 80's, it was fashionable to have cabinets and drawers with NO hardware. The result? Filthy cabinets and drawers. I need KNOBS!! Always looking for a deal, I consulted Ebay and found gorgeous, simple, Restoration Hardware brand knobs and cup pulls in Oiled Bronze. $1.95 each as opposed to $5.95 each in the store! Instant uplift for cabinets, which I had also refinished using Old English and a lot of elbow grease!

Dishwasher: Raleigh DIY Diva- February 2, 2006


New GE Profile Dishwasher, too!
It actually cleans the dishes, and doesn't rot the floor! WOW!

GE Profile: Raleigh DIY Diva- February 2, 2006


New appliances really help push a kitchen renovation closer to being DONE! They also help push the budget over the edge! Our kitchen was filled with dated old black appliances. The dishwasher, as you know, hardly qualified as an appliance. The stove worked, but not well. (The subfloor is painted since it was so ugly. It's still pretty ugly, but drawing and painting on the floor has been fun for me and the kiddo!) Out with the old......................

In with the new GE Profile Range!!!!!!!!!!!!!

Subfloor Patch- Raleigh DIY Diva- February 2, 2006

Once the rotten subfloor was discovered, we pulled up all the vinyl around the damaged area and were happy to discover that the subfloor was made from cabinet grade plywood rather than today's builders choice of particle board. I simply exposed all of the damaged area, set a circular saw to 3/4 inch heavy (for newbies, that means a fraction of an eyelash past 3/4 of an inch for the blade height), and cut out the rotted wood. This exposed the vapor barrier, which I replaced. On top of the new barrier, I measured, cut, and screwed down a cabinet grade plywood "patch." This worked perfectly and eliminated the faint stench that we had been assuming was "musty old house needs painting" scent. Yee- Haa!

Wednesday, February 01, 2006

Wanna get hammered?

Shout Out! Represent! Comments, Please! Raleigh DIY DIVA- February 1, 2006

Raise your hand (electronically, of course) if you have ever "Done It Yourself." You know what I mean-- restored, repaired, reduced, renovated-- something in your living quarters. Comments, Please! Describe!

Countertop Fabricator, Hardware Store, Hardwood Flooring, Margaritas, Pest Control, Screen Doors, Lawn Care! Raleigh DIY Diva- February 1, 2006

Ultra fabulous local places and people DIY Divas
(and Divos) can count on:

Elite Countertops- Ask for Rob
North Raleigh Ace Hardware- Ask for Richard
North Raleigh Home Depot Flooring Dept- Ask for Brian
Keller Williams Realty- Ask for Michelle Edwards
Tanas Hair Designs- Fabulous Master Stylist Lewie Wells (a diva must look her best, you know!)
Wake County Public Schools- For a high quality free education!
Canter Electric- Ask for Steve Maxwell
Las Palmas Leesville (for great Mexican food and the best DIY reward Margaritas)- Ask for Paco or Raquel
The Habitat for Humanity Reuse Center- unique used building supplies
All Triangle Area Goodwill stores- for great "found" items
Pest Pros- Ask for Lee
Wake Appliance Repair- Ask for Mickey
Wake Roof Repair- Ask for Stuart
Acres of Green- Ask for Todd
Carolina Plumbing- Ask for Mike
Triangle Installation- for Gutters
ReelScreens of Raleigh- Ask for John

I will add more as I think of them!!


House Hunters. Track Built Homes. Go Custom! Raleigh DIY Diva- February 1, 2006

Now here's my plug for house hunters to see past the cosmetic beauty often in your face in newer, track built homes. Picture this: You are about to stick your neck out and place the majority of your annual income toward a home of your own. You like nice things, and want your home to be "pretty." Enter big money making machine home builder. An acre holds 3 or 4 homes, and as a back drop to Monday Night Football, you get to watch your grandmotherly neighbor prepare for her bath each evening. Lovely. Choose from 6 floorplans and 15 front door colors, and POOF! You're in Stepford! The moral of this story: Buy or build a custom home, and don't be afraid to be a DIY Diva (or Divo) and tackle home improvement! I'm here to support you!

Rotten Floor! Vapor Barrier! Raleigh DIY Diva- February 1, 2006


A rotten subfloor! This home was custom built in 1981, and though dated and just old enough to start acting up, she boasts certain attention to details for which we are grateful. For example, although the immediate 3/4 inch plywood subfloor was rotten through and through, the builder (Canterbury Homes) had the foresight to put a vapor barrier between it and a 1/4 inch plywood "sub-subfloor." This vapor barrier and 1/4 inch "shield" of sorts worked nicely to protect the floor joists from said rot. A happy happy thing, since that type of repair could be extremely costly.

Time Off to Go Shopping! Raleigh DIY Diva- February 1, 2006

FIVE LAYERS OF VINYL!!!

LEAKY OLD DISHWASHER!!!

The DIY Diva took the day off yesterday and went shopping! I also got my legs waxed for the first time--yeow!! But, no shaving for 6 weeks means more time to DIY!

Since I vowed to start at the beginning, here is what we found early in the adventures led by This Old House. This photo shows the dishwasher that was present when we moved in. Who knows how old this thing was-- PO was not known for updating or upgrading. Anyhoo, the first couple of washes did OK-- but moving in we were doing a lot of paper plates and washing only glasses. When we started washing pots and pans, we noticed that they were NOT getting clean at all!! It was more work to prewash the dishes than it was worth. On the final run of the old black beast, I noticed H2O on the floor. Horrors!! We have an American Home Shield Home Warranty, so I placed the initial call. The guy came out and said, "This thing has probably been drip drip dripping for three years or more." He and I looked at each other and began to pull up the peel and stick tiles (which were ugly anyway) by hand. First shocker, then again--not so much: PO had indeed made an effort to "update" the flooring. Layer upon layer (five total) of cheap vinyl was semi-glued (finally a blessing) to the subfloor and subsequent layers of the stuff. All was secured with a weird colored quarter round. But, lo and behold, what did we find? Well guess.................................

Google
 
Web www.bejane.com
www.homedepot.com